Setup FTPS server on Archlinux
Table of Contents
History of FTP servers
The original specification for the File Transfer Protocol was written by Abhay Bhushan and published as RFC 114 on 16 April 1971. Until 1980, FTP was still running on NCP (Network Control Program) the predecessor of TCP/IP, the protocol was later replaced by a TCP/IP version, RFC 765 (June 1980). On September 1998, RFC 2428 added IPv6 support and defined a new type of passive mode.
Protocol Overview
FTP can run in either active or passive mode, the mode determines how the data connection is established. In both cases, the client first creates a TCP control connection from a random source port (usually an unprivileged port > 1024) to the FTP server command port 21.
- active mode: In this mode, the client starts listening for incoming data connetions from the server on
PORT M(chosen by the client). It sends the FTP commandPORT Mto inform the server on which port it is listening. the server then initiates a data channel to the client from its port 20 (FTP server’s data port). - passive mode: This mode is used in situations where the client is behind a
firewallwhich is blocking incoming TCP connections, in this situation we can use thepassive mode, so the client uses the control connection to send aPASVcommand to the server and then receives a server IP address and server port number from the server, which will be used by the client to open a data connection from an arbitrary client port to the server IP address and port number received.
Installing vsftpd
After getting your server up and running, the logical thing to do is to implement a way to easily manage your remote files and directories.
FTP and FTPS require an FTP server to be installed. Our FTP server of choice is vsfptd,
vsftpd package is available from Arch’s Official repositories, which means you can just pacman -Sync it (you dont have to build it).
Supposing you have SSH access to your VPS or your archlinux VM.
sudo pacman -S vsftpd
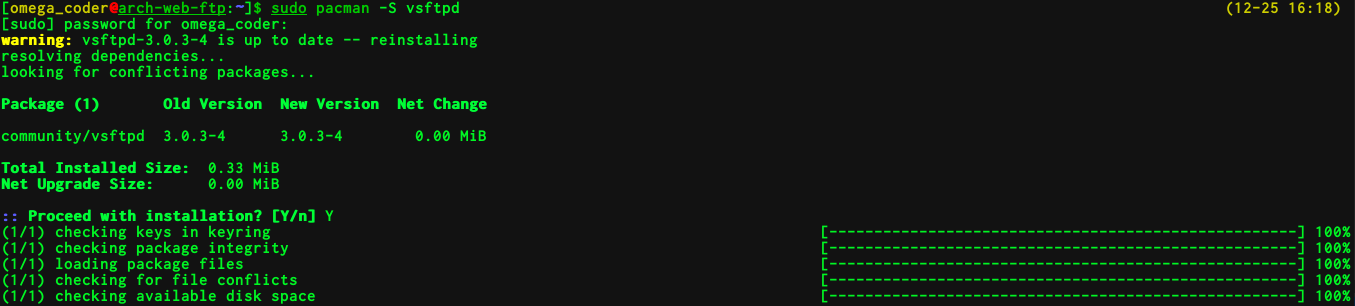
Now you got vsfptd installed ! (Easy-Peasy).
We will see two possible configurations of an FTP server, one is a Plain FTP server (dates back to 1970’s and is a security nightmare), and another configuration where we will configure vsftpd as an FTPS server
- First — Configure vsftpd as a Plain FTP server
the configuration file for vsfptd can be found in /etc directory.
a brief look inside /etc directory:
It contains all system related configuration files or in it’s sub-directories. A “Configuration file” is defined as a local file used to control the operation of a program; it must be static and cannot be an executable binary.
Let’s edit our configuration file (we will use vim)
sudo vim /etc/vsftpd.conf
Edit the lines below as the following: (uncomment them by removing the preceding #)
anonymous_enable=NO
local_enable=YES
write_enable=YES
local_umask=022
anonymous_enable=NO: Don’t allow anyone to access our FTP server (without valid credentials)
local_enable=YES: allow local users to use FTP. (a local user is one whose username, password reside on your archlinux host. )
write_enable=YES: give users ability to write (upload, update) on files
On Linux, when a file or directory is created, it is created with a default set of permissions that allow a users to **R**ead, **Write and/or eX**ecute the file.
local_umask=077:is the default value in vsftpd. No other end user can read or write your data if umask remains set to 077.So, for example, if you upload a webpage file under umask 077, no one will be able to see it.
local_umask=022 will only allow you to write data, but anyone can read it.
| Command | Utility |
|---|---|
| umask | view current umask setting |
| umask 077 | change umask setting of current shell to 007 |
sudo systemctl restart vsftpd
Now let’s test if it’s working, let’s try FTPing to our archlinux IP address from our machine.
You should get a similar output.

if you get a 500 Error response like the following error: 500 OOPS: priv_sock_get_cmd then just add this line to the end of your configuration file —
seccomp_sandbox=NO
Don’t forget to restart vsftpd.
Creating a unique FTP user
vsftpd recommends that you define on your system a unique user which the ftp server can use as a totally isolated and unprivileged user.
so, let’s create a user just for FTPing, this user can’t do anything such as login via SSH. So, if the user gets compromised, our machine is not left wide open (can’t login using that username).
sudo useradd -g ftp -d /srv/http -s /sbin/nologin userftp
| Option | Utility |
|---|---|
| -s | puts the user userftp in the no-login shell list |
| -g | adds userftp to the ftp group |
| -d | home directory where the user loggin in as userftp will automatically start the ftp session in. |
Now set a password for userftp using:
passwd userftp
- Enable the
nopriv_useroption in the config file (vsftpd.conf):
nopriv_user=userftp
Now that you have a unique user and password for FTPing, try logging in as userftp to your sever from your local machine using an FTP client (ex. FileZilla), if everything goes well, you should be able to see remote files and directories in /srv/http
Now, we need to change permissions for any files and directories in /srv/http, userftp must be able to edit and delete those files and directories through FTP. Let’s use chown to change the owner of /srv/http to userftp
sudo chown -R userftp /srv/http
Now let’s edit the file/directory permissions so that userftp can both read and write to them, and anyone else can only read them.
sudo chmod -R 644 /srv/http
Now you should be able to view files, delete, and transfer files from your local machine to the FTP server and vice-versa.
Useful commands:
| Command | explanation |
|---|---|
| chown | change file/directory owner and group |
| chmod | Change access permissions, change mode. |
for more informations about these two commands, refer to the links below:
- Second — Configure vsftpd as an FTPS server
Till now, we only configured a plain FTP server, our next step is to encrypt our FTP sessions over SSL/TLS.In order do achieve this, we will create an SSL certificate on our server in /etc/ssl/certs.
cd /etc/ssl/certs
Using openssl create an SSL certificate.
openssl req -x509 -nodes -days 365 -newkey rsa:2048 -keyout vsftpd.pem -out vsftpd.pem
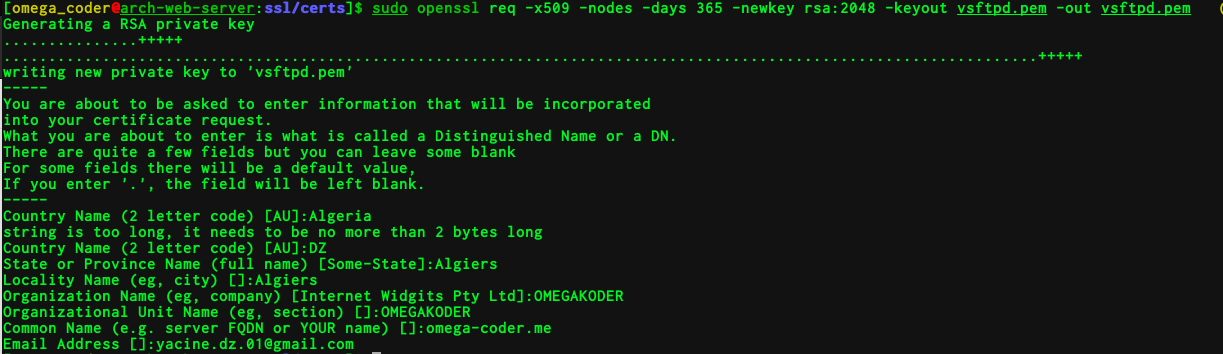
when generating the certificate you will asked some questions about your company, soo just write whatever you want, since we will only use the certificate to encrypt the connection.
sudo vim /etc/vsftpd.conf
Now change the following options, some of them may not be already there, so you can just add them.
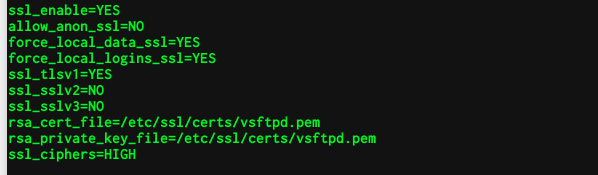
Now restart the service.
sudo systemctl restart vsftpd
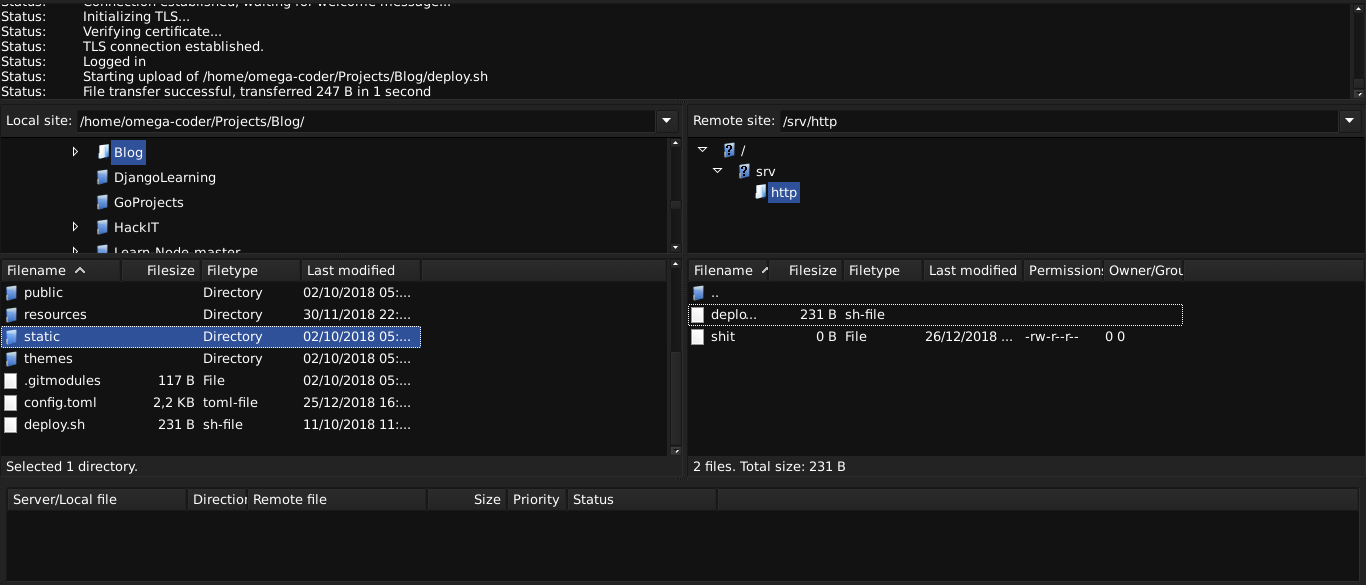
Now you can use FileZilla to connect to your FTPS server.
NOTE: When you are prompted the Unknown Certificate Window, just continue
Here is a screenshot of a FileZilla session over SSL/TLS
FTP vs.FTPS in Wireshark
- FTP
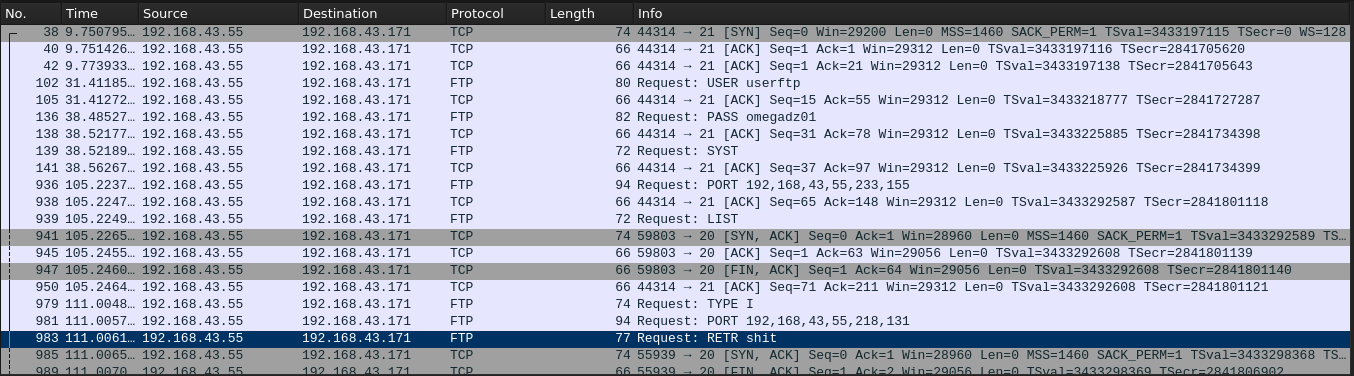
If anyone manages to sniff our traffic, he would then have everything in his hands, usernames, passwords, files, anything!.
- FTPS
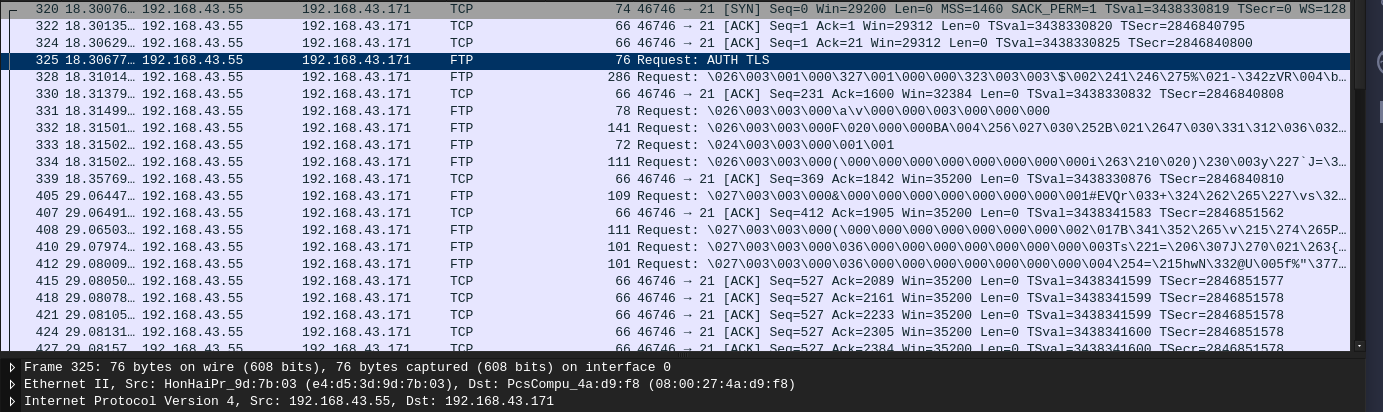
Now, Everything is encrypted!!