Streaming server using NGINX and nginx-rtmp-module
Introduction
Most people who do streaming enjoy services like Twitch.tv in order to deliver video for viewers, which is a pretty good solution, but when it comes to having more control over your streams, or when you take in consideration the ability of people streaming to your server, or you want to stream to multiple places, or any other things that require having access to an actual RTMP stream from an RTMP server.
In this guide we will cover the very basics of setting up a simple RTMP streaming server on an Ubuntu 16.04 server machine
What is RTMP ?
Real Time Messaging Protocol (RTMP) was initially developed by Macromedia, for streaming on-demand and live media to Adobe Flash applications. It is a TCP-based protocol which maintains persistent connections and is defined as a statefull protocol. This means that from the first time a client connects until the time it disconnects, the streaming server keeps track of the client’s actions. On the other side, HTTP is a stateless application protocol used to deliver hypermedia information across the Internet worldwide
Advantages of HTTP over RTMP
- Less likely to be blocked by firewalls at different levels in the network, RTMP uses default port 1935 which is sometimes blocked, espacially within corporate Firewalls.
- Supported by more CDNs.
- More expertise in customizing HTTP.
Advantages of RTMP over HTTP
- Can provide multicast support.
- Security and IP protection, using TLS/SSL or RTMPE.
- Seeking: when dealing with long-duration media content, the viewer doesn’t have to wait for the video to load before jumping ahead, which is the case for HTTP-delivered videos.
- Reconnect: when there is a network disruption, the viewer can re-establish a new connection, while the video continues playing from the buffer, as soon as the client re-connects, the buffer will begin filling to avoid disruption in either the video or audio.
A couple of things you can do with your own RTMP streaming server:
- Stream to multiple external channels.
- import other people’s streams.
Now, let’s start bulding our streaming server.
NOTE
Using Nginx with RTMP module requires compiling nginx from source; dont get afraid!, it’s not that hard
Step1 — Setting up a server
The first step is to set up a server, we will be using an ubuntu server 16.04 LTS as our OS. you could install your server in a Raspberry Pi and it will run like a charm, because RTMP is extremely light on system resources.
Step 2 — Installing Nginx + nginx-rtmp-module
Login to your server and make sure your user is in sudoers file, or just login as root.
1- Install Nginx dependencies
sudo apt install build-essential libpcre3 libpcre3-dev libssl-dev
2- Clone nginx-rtmp-module
We recommend using this forked module by sergey-dryabzhinsky . it’s being actively worked on and contains more fixes and improvements over the original one.
git clone https://github.com/sergey-dryabzhinsky/nginx-rtmp-module.git
3- Download NGINX
wget http://nginx.org/download/nginx-1.14.2.tar.gz
tar -xf nginx-1.14.2.tar.gz
cd nginx-1.14.2
Now comes the compiling step.
4- Compile NGINX
./configure --with-http_ssl_module --add-module=../nginx-rtmp-module
make -j 1
sudo make install
--add-module=../nginx-rtmp-module: the --add-module argument must point to the correct path where nginx-rtmp-module is located.
-j 1: this is an optional argument for the make command, you can set it to the amount of cpu’s you have on your computer to accelerate the compilation process
Now you should have a running installation of nginx with the nginx-rtmp module included.
By default it installs to /usr/local/nginx, so to start the server run the following command:
sudo /usr/local/nginx/sbin/nginx
Step 3 — Configure NGINX to use RTMP.
NGINX config file is located at /usr/local/nginx/conf/nginx.conf. Open the nginx configuration file using your favourite text editor ( it's VIM yeah; you guessed that right!!)
sudo vim /usr/local/nginx/conf/nginx.conf
Add the following configuration to the end of the configuration file. (Outside the http block).
rtmp {
    server {
        listen 1935;
        chunk_size 4096;
        max_connections 100;
        ping 30s;
        notify_method get;

        application my_live {
            live on;
            hls on;
            hls_path /tmp/hls;
            hls_fragment 3s;
            hls_playlist_length 60s;

            # Don't allow RTMP playback
            deny play all;

        }


        application vod {
            play /usr/local/nginx/rtmp;
        }
    }
}
NOTE: you have to create a folder where to put your videos.
I created a folder called rtmp located in /usr/local/nginx/.

Now restart your server!.
sudo /usr/local/nginx/sbin/nginx -s stop
sudo /usr/local/nginx/sbin/nginx
If your server is already running, you can just reload it, since we only made configurations changes.
sudo /usr/local/nginx/sbin/nginx -s reload
Step 4 — Testing
We can test our streaming server using VLC media player since it supports RTMP. We will only test the Vod (Video On Demand), we will leave HLS for the next time since it invloves pushing the stream from a remote location and then pulling it again from another location (we can push the stream using the great ffmpeg!)
NOTE: Make sure the streaming server can be reached from your machine
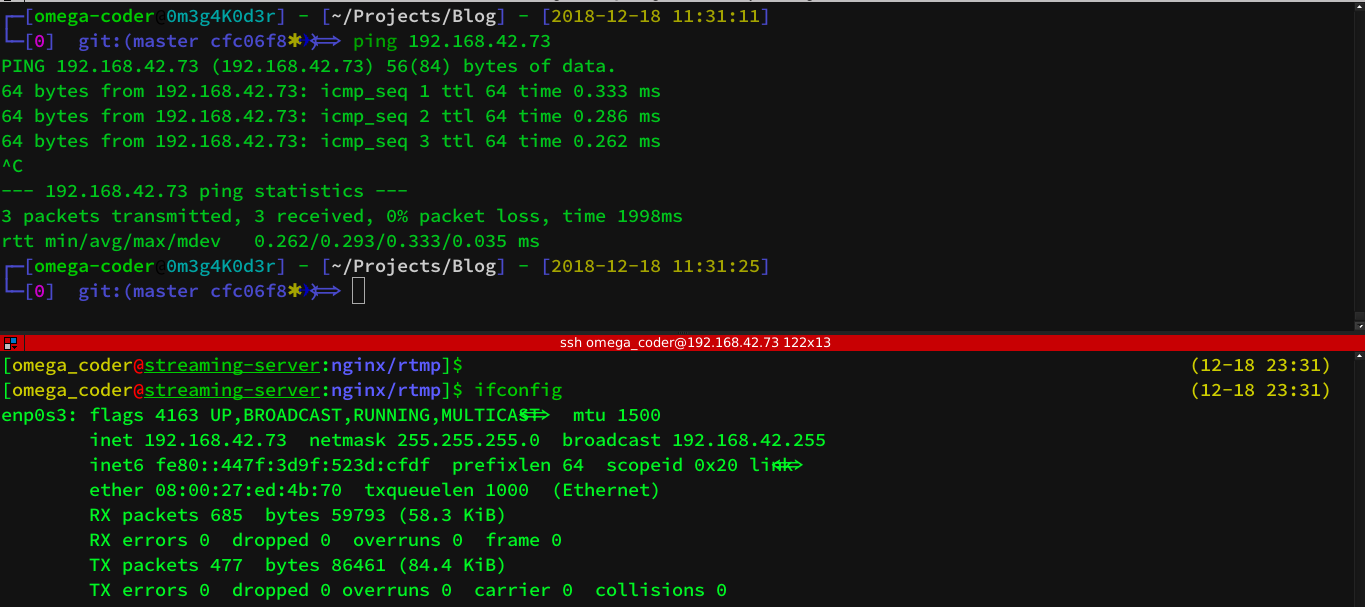
Let’s test our Vod application now.
Our Vod application is working fine, in the next guide we will discuss live streaming using HLS and the great ffmpeg and we will also use OBS studio to push a live stream to the server.
Thanks for reading!